Sunday 31 March 2013

FF samples 6

Another similar card using the gorgeous Flowering Flourishes stamp set, come back tomorrow for a different colour palette.


A closer look. Those butterflies are sooo sparkly in real life.


Piercing around the die cut adds detail to the overall design and I like it!
What do you think?


Thank you for visiting my blog.
Until next time, Happy Crafting, Dawn x

Saturday 30 March 2013

FF samples 5

Here is my classy black and white option of this very simple and quite striking design.


This is probably the quickest card I have ever made and yet I think it looks great,
what do you think?


I stamped the largest flourish from my Flowering Flourishes stamp set with Stazon black ink, stamping off the page, a black satin ribbon with a knot tied on one side, a couple of rhinestones, a greeting and finished!


Thank you for visiting my blog today.
Until next time, Happy Crafting, Dawn x

Friday 29 March 2013

FF samples 4

Wishing all my visitors today a very Happy Good Friday!


This is the second card we made at our last workshop, Flowering Flourishes, "The Big One" For me details read back the last few posts.
This is a large card, I started with an 8x8 inch card blank.
I cut three panels, one crumb cake, one lucky limeade and one real red (I think these colours work well together, what do you think?)
I die cut a topper and stamped the largest of the three designs from the Flowering Flourishes stamp set using lucky limeade ink, I also inked around the edges to soften the effect.
I punched the flowers from real red card using my boho punch, the centres were punched from the amazingly sparkly glitter card, I put a small piece of foam tape between each layer of the flower to add depth (If you want to keep your cards a little flatter for posting these flowers could easily be stuck together with glue)


A close up of the super sparkly flowers, what do you think?


Thank you for taking the time to visit my blog today, please leave a comment below so I know you have been. Until next time, Happy Crafting, Dawn x

Thursday 28 March 2013

FF samples 3

Is clean and simple your style?
I think this card fits that style.


I started with an A5 crumb cake card blank.
Using my circle circus stamp set I stamped various designs from the set with versamark ink around the bottom and middle of the card and then embossed with white embossing powder.
I die cut the tag from my two tags die, in whisper white card. I inked the smallest of the three stamps from my Flowering Flourishes stamp set in lucky limeade, wiped of the flower head with a baby wipe and using my real red marker I coloured the flower head, I then stamped onto the tag. I added a small piece of real red card, trimmed the edge with my scallop border punch, a button from the neutral selection, white twine through the button and then drew two lines all to add details. I opted to fix my tag horizontally but you can put it whichever way you like.


A close up of the tag.
This shows the embossing effect rather well too.


What do you think? Is this your kind of card?
Leave me a comment below.
Until next time, Thank you for visiting and Happy Crafting, Dawn x

Wednesday 27 March 2013

FF samples 2

Morning, so if you like your cards to have a bit more going on then maybe this is for you.

I started with an A5 crumb cake card blank, and stamped using versamark ink and a stamp from the Flowering Flourishes set, all around the background, stamping off the edge.
I cut my all time favourite die, called Top Note in whisper white card, I then stamped with crumb cake ink and the smallest stamp from the set around the edges.
I die cut a large pirouette pink butterfly and embossed it for texture, I die cut a smaller butterfly in whisper white, folded both the butterflies down the centre, I layered them one on top of the other and added pearls down the centre of the top butterfly. When assembling I cut a small strip of paper in the matching pink pirouette and cut a "v" shape from one end (I used a square punch, turned side ways to make this cut accurate) I added this strip behind my Top note die cut. I stamped my greeting on the tongue of the paper. To finish I added a small folded piece of ribbon under the largest butterfly and a few scattered pearls.


A close up of the layered butterflies.


I stamped my greeting on the tongue.


Those pearls are so cute.


What do you think? Is this your type of card?
Leave me a comment below.
Until next time, thank you for visiting and Happy crafting, Dawn x

Tuesday 26 March 2013

Workshop card

This is one of the cards we made recently at my Flowering Flourishes workshop, otherwise known as "The Big One" for more details of why it was called this read back the last couple of posts.

A bright white 6x6 inch white card blank, with a real red layer. A gorgeous die cut, pierced around the edge and stamped with a stamp from the Flowering Flourish stamp set using lucky limeade ink and a real red marker pen, this technique is quite easy. I inked my whole stamp using the green ink then with a baby wipe I rubbed off the flowers and using the marker coloured them red, I then stamped the whole design on to my die cut. Tiny brads to the centre of the flowers and a twist of ribbon to finish.


I'm really loving the pierced look at the moment and doesn't it look great around the die cut, adding real definition?


This technique is great to use up all those tiny pieces of ribbon that would probably head for the bin, a simple knot.


Is this your style of card?
Leave me a comment, let me know what you think.
Until next time, thank you for visiting and Happy Crafting, Dawn x

Monday 25 March 2013

FF samples

Here is a very simple card using the gorgeous flowering flourishes stamp set.
This time I stamped with real red ink onto a gloss card blank and heat embossed with clear embossing ink to set it. A simple strip of ribbon and a knot along the lower edge. I stamped a heart in red and cut out, I stuck this with a foam pad for dimension. A greeting below the knot to finish.


Ooops! A close up, but I forgot to turn the photo the right way around, sorry.


Yes, close up photographs are not my thing, sorry its so blurry!


This was a very quick card and yet I think it looks quite classy, I have another design like this that I will show another day.
Is this too simple a design for you? Or do you like clean and simple cards? 
Leave me a comment below, so I don't feel like I'm alone.
Until next time, Happy Crafting, and thank you for visiting, Dawn x

Sunday 24 March 2013

Flowering Flourishes workshop samples

Well I have been away for too long, I've been busy making samples for my Flowering Flourishes workshop, also known to my ladies as "The Big One" before you ask I will explain why it got this name, at most of my workshops my ladies make two cards, I provide everything needed and we share the stamp set(s) between us and I make a small charge for these, well I had an idea to coincide with Stampin' Up! saleabration promotion, where I choose a selection of products that we then use to make two cards and at the end you get to take the items away with you and craft to your hearts content, and your cards of course. Why does it matter about saleabration? Well for every £45 you spend during this time you get to chose a product from a choice, this year of 17 items, varying from ribbon and button bundles, papers, embossing folders, stamp sets, punches etc so for each of my ladies who signed up for "The Big One" they each chose their free gift. The items in the top photograph are what they paid for and the next few cards I show will be using these products and adding some bits from my stash to show the versatility of this stamp set, there was so much more I wanted to do with them but I just ran out of time, I know I will reach for this stamp set a lot!
So each person had.....
 Flowering Flourishes clear mount stamp set
Lucky Limeade ink pad
Real red marker pen
A pot of tiny silver brads
and a Boho flower punch, that escaped the photo
(And their choice of free product, from the leaflet)


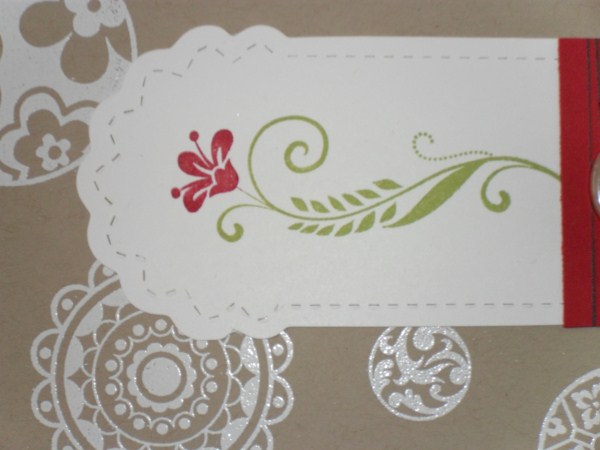
Here is a very simple card I made using the stamp set with gilding flakes, it looks so much more lush in real life.

A close up of the gilding.


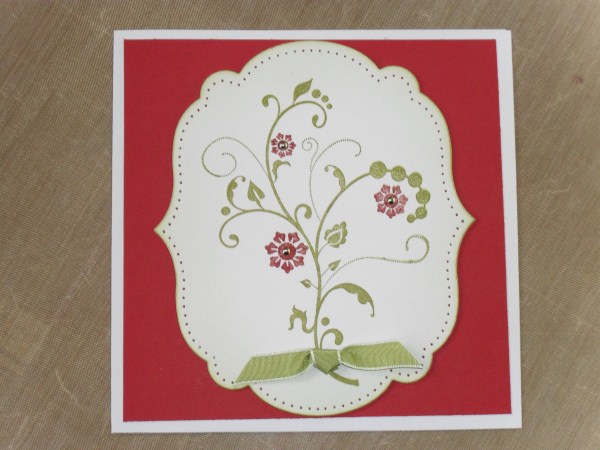
Simply stamped in real red, a couple of rhinestones, a twist of ribbon and finished, simple.


Do you like simple cards or something more complicated, this stamp set can do both?
What do you think?
Leave a comment below, until next time Happy Crafting, dawn x

Saturday 2 March 2013

Flowering Flourishes


Here is a card I made with my Flowering Flourishes stamp set, have I said that I love this stamp set?


A close up of the topper.


A simple embossed background adds texture and interest.


The gorgeous flowers were made with the boho punch.


Ok, so what did I do?
I started with my favourite square card blank. I embossed a layer with an embossing folder and inked around the edge for definition, I used lucky limeade ink.
I die cut my shape and stamped the largest stamp from the set in lucky limeade ink. The ribbon is rich razzleberry, and so are the flowers. Rhinestones in the centre of the flowers and a few simple pearls to finish.


What do you think? Is this your kind of card? Leave a comment to let me know.
Until next time, happy crafting, Dawn x