Showing posts with label whisper white card. Show all posts
Showing posts with label whisper white card. Show all posts
Sunday, 27 April 2014
Hello, doily
I've just had a quick play this morning and this is what I came up with. I stamped hello doily and my greeting from sincere salutations (I love this set) onto whisper white card using crumb cake on ink, I matted this onto crumb cake card. I die cut a dress form and stamped using the corner stamp from so very grateful with versamark ink and heat embossed with clear powder. I punched flowers using one of my itty bitty punches, the leaves are from the bird punch, all out of whisper white card. I pierced a decorative border onto my base card and assembled all the pieces, I added rhinestones to the centre of the flowers and the dot of the greeting. Another simple card. I have added some close up pics to show the detail. What do you think?
Sunday, 14 April 2013
Last FF sample
So finally my last sample from the flowering flourish workshop, I know there were a lot but, did you notice I managed to blog for at least two weeks every day!!!
So for my last sample I wanted something different, here is a simple tag.
You can see the 3D butterfly from this angle.
Thank you for visiting my blog,
I hope you have enjoyed seeing my flourish samples, I'm not sure what is coming next as I need to have a play but until then, Happy Crafting, Dawn x
Thursday, 14 February 2013
Happy Valentines Day
Wishing everyone a very Happy Valentine's Day!
Here is a very simple card I made.
I started with a white gloss card blank, then layered half the card with real red and the other half with whisper white. I die cut the letters from both the white and red card, cutting them down the centre and sticking the white on top of the whole red letter. I punched a couple of sparkly silver hearts and added a faux stitched line around the outside and here it is...finished, a quick and simple card.
This second photo makes it look more like pink, in real life its definitely red!
Is this your kind of card or too simple and plain?
Leave a comment to let me know you came by.
Until next time, Happy Crafting, Dawn x
Sunday, 10 February 2013
Summer silhouettes
Another busy and strange day, I'm having a few of them recently.
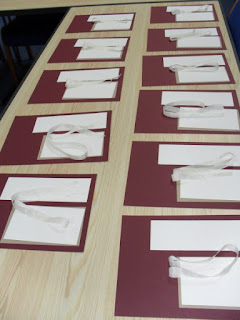
It started by setting up for my afternoon workshop.
Here are the piles of bits lined up on the table.
Here are the tables all set up.
Everyone gets the same...
This is the first card we made.
I used an A5 card blank in bravo burgundy, a strip of whisper white for the left hand side, stamped with the border stamp from summer silhouettes stamp set, inked in rich razzleberry ink, lined up by eye to make a continuous pattern (I will show you my trick for that when I take the photo of the stamp set, hopefully in the next couple of days)
A crumb cake layer and a whisper white mat for the stamping, this is the best card for stamping on in my opinion! I started by stamping the two size stalks in a random fashion with old olive ink, I then added the burst of flowers in rich razzleberry ink and the smaller flower in marina mist ink, trying to line them up with the stalks, this set is quite easy to do this with, you don't need a stamp positioner. I stamped one of the tiny filler stamps, from the same set, in crumb cake around the whole layer to fill the white space. Some crumb cake ribbon to add a bow, I died this ribbon as it was vanilla to start with, I used a crumb cake ink refil. A couple of drops of ink on your non stick mat, add a few spritz of water and run your ribbon through it well for an even coverage, dry with a heat gun and to get it flat and neat I used my hair straighteners to iron it, well I don't like ironing!
I stamped my greeting from tiny sentiments stamp set onto marina mist card and punched with the versatile modern label punch, I tucked this behind my top layer slightly.
Our second card was also using summer silhouettes stamp set.
I started with a riding hood red A5 card base.
I cut a piece of crumb cake card for the mat, I stamped the leafy branch twice in old olive on to this layer. I stamped three flowers on to whisper white card using riding hood red ink and cut them out by hand, leaving a narrow white edge, I glued the flowers on after shaping them a little and finished them with a rhinestone in the centre.
I stamped using basic grey ink on to whisper white card and a stamp from my stash for the newsprint look near the bottom.
I stamped my greeting from tiny sentiments set with riding hood red ink again on to whisper white card and punched it out using my modern label punch.
For the border I cut baja breeze card with my adorning accent edgelit die, I used both the positive and negative parts, one above my panel and one below.
What do you think?
Is this your cup of tea?
Would you like to join us at our next workshop, making cards like these?
Leave me a comment below or contact me for more details of my next workshop dates.
Until next time, thank you for visiting and happy crafting, Dawn x
Saturday, 19 January 2013
Flitter flakes
I had this gorgeous stamp by IndigoBlu as a gift for Christmas with some flitter glue and flakes and this is what I made.
The greeting was printed on the computer.
I hope you like my card.
Please leave a comment below.
Until next time, Happy Crafting, Dawn x
Labels:
basic black card,
flakes,
flitter glue,
rhinestones,
stamp,
whisper white card
Sunday, 19 August 2012
Mixed bunch
I made these cards a while ago for a workshop, as you can see they are the same design in reverse colour ways. A simple design, an A6 card blank was my starting place, with a mount of tempting turquoise or melon mambo, then another layer of whisper white, stamped with a script background and then heat embossed using the mixed bunch stamp set and either tempting turquoise or melon mambo embossing powder.
The turquoise option.
The pink option.
The stamp is very detailed even when heat embossed as shown here.
The melon mambo embossing looks fabulous.
I hope you like my simple design using the gorgeous mixed bunch stamp set.
Until next time Happy Crafting Dawn x
Sunday, 12 August 2012
Happy Birthday Chris
Today is a good friend of mines birthday, she adores house mouse so I had to make her one of them and here it is.
A relaxing mouse, just like you should be on your birthday.
A close up of the decoupaged mouse.
A close up of the 3D flower made with the Stampin' Up! flower punch.
And we mustn't forget the inside of the card, so here is the insert.
So I hope you have a fantastic day Chris enjoy every second, Happy Birthday.
Until next time, Happy Crafting Dawn x
Saturday, 11 August 2012
Sympathy
Sympathy cards are a little challenging for me, maybe its the occasion, I like to keep them very simple, here is my effort.
A close up of the flower and sentiment...
Until next time, Happy crafting Dawn x
Wednesday, 1 August 2012
Buckle cards...
I was looking through my photos and found these of cards I had made a while ago and can't remember sharing so here they are.
They both use Sue Wilson's buckle technique, this was my first attempt so please be kind.
As you can see I embossed the top part of my card and stuck dsp on the lower part. I die cut three frames, choosing my centre one to be slightly different to the outside two, and thread a strip of card backed onto black through the frames, I had to do this a couple of times to get it right (Sue makes it look so easy!) I stamped my sentiment onto the left side and added some black "pearls" to finish.
A close up to show some more detail.
My second card is using the same layout but different dies and colour combo.
This time I stamped the top section and embossed the lower section.
Again a closer look at the detail.
Please leave a comment to let me know which one you prefer.
Until next time, Happy crafting Dawn x
Saturday, 5 May 2012
The Open Sea
Stampin' Up! have released their new mini catalogue, their first summer mini for the UK market, and to say its bursting with fun new "stuff" is somewhat an understatement.
The stamp set I just had to have and play with first is "The Open Sea" a fabulous stamp set with a male theme (if you want it to be, that is)
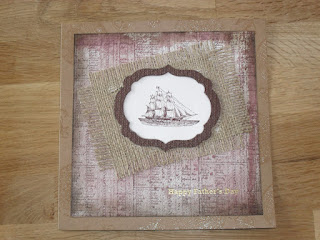
Here is my card, this uses the open sea stamp set and the amazing new label collection framelits dies.
Here is a close up of the beautiful ship from this stamp set, stamped simply in early espresso ink on whisper white card, this is the only card if you like stamping (in my opinion), it takes the ink to perfection. I cut the shape using the brand new framelit dies and made a frame using two of the framelit dies, I embossed the frame using the square lattice embossing folder.
As you can see from this close up I have used all the stamps from this set, the world and compass stamped with versamark and then embossed with clear embossing powder on my base card. The next layer is whisper white card, stamped using the writing stamp, spritzed with chocolate chip, crumb cake and early espresso inks. I layered this onto a piece of hessian for extra texture and finished with a stamped sentiment and embossed with gold embossing powder.
I am really pleased with how this card turned out, leave me a message to let me know what you think.
Until next time Happy Crafting Dawn x
Subscribe to:
Posts (Atom)


