Showing posts with label crumb cake card. Show all posts

Saturday, 5 July 2014

Best wishes

I made this card for a friend who was recovering from an operation and decided on the greeting of best wishes rather than get well soon.


Here's a close up of the simple greeting, with the cute floral corner stamp.


I shaped the super cute petite petals for a more natural feel and added a simple pearl to the centres, I think this adds to the overall depth of the card. 


My colour palette is crumb cake and very vanilla.


What do you think? Is this your style of card or not? Leave a message to let me know. 
Thank you for visiting, until next time happy crafting Dawn x

Wednesday, 30 April 2014

Very Vanilla

I looked at my last card and I wasn't quite as happy as I could be so I thought for a while and decided it needed to be a little warmer in colour tone so I made another one this time using very vanilla card, much better, I think, I added a fab little flower from stash to tweak it slightly.
What do you think? Which do you prefer?
 
         Cute flower, don't you think?

Do you like the pierced edge? I think visually it adds another layer to the card and a little texture too.


I love the hello doily stamp, I wish I had seen it before.

 
A few close ups today, I'm trying to remember to take more pics.
All for now, Dawn x

Sunday, 27 April 2014

Hello, doily

I've just had a quick play this morning and this is what I came up with. I stamped hello doily and my greeting from  sincere salutations (I love this set) onto whisper white card using crumb cake on ink, I matted this onto crumb cake card. I die cut a dress form and stamped using the corner stamp from so very grateful with versamark ink and heat embossed with clear powder. I punched flowers using one of my itty bitty punches, the leaves are from the bird punch, all out of whisper white card. I pierced a decorative border onto my base card and assembled all the pieces, I added rhinestones to the centre of the flowers and the dot of the greeting. Another simple card. I have added some close up pics to show the detail. What do you think?
All for now Dawn


Look at the detail of the hello doily stamp.

The stamped flowers on the die cut don't look like a corner stamp now.

I like the look of the rhinestone as part of the greeting and that simple pierced border.

Thursday, 28 March 2013

FF samples 3

Is clean and simple your style?
I think this card fits that style.


I started with an A5 crumb cake card blank.
Using my circle circus stamp set I stamped various designs from the set with versamark ink around the bottom and middle of the card and then embossed with white embossing powder.
I die cut the tag from my two tags die, in whisper white card. I inked the smallest of the three stamps from my Flowering Flourishes stamp set in lucky limeade, wiped of the flower head with a baby wipe and using my real red marker I coloured the flower head, I then stamped onto the tag. I added a small piece of real red card, trimmed the edge with my scallop border punch, a button from the neutral selection, white twine through the button and then drew two lines all to add details. I opted to fix my tag horizontally but you can put it whichever way you like.


A close up of the tag.
This shows the embossing effect rather well too.


What do you think? Is this your kind of card?
Leave me a comment below.
Until next time, Thank you for visiting and Happy Crafting, Dawn x

Wednesday, 27 March 2013

FF samples 2

Morning, so if you like your cards to have a bit more going on then maybe this is for you.

I started with an A5 crumb cake card blank, and stamped using versamark ink and a stamp from the Flowering Flourishes set, all around the background, stamping off the edge.
I cut my all time favourite die, called Top Note in whisper white card, I then stamped with crumb cake ink and the smallest stamp from the set around the edges.
I die cut a large pirouette pink butterfly and embossed it for texture, I die cut a smaller butterfly in whisper white, folded both the butterflies down the centre, I layered them one on top of the other and added pearls down the centre of the top butterfly. When assembling I cut a small strip of paper in the matching pink pirouette and cut a "v" shape from one end (I used a square punch, turned side ways to make this cut accurate) I added this strip behind my Top note die cut. I stamped my greeting on the tongue of the paper. To finish I added a small folded piece of ribbon under the largest butterfly and a few scattered pearls.


A close up of the layered butterflies.


I stamped my greeting on the tongue.


Those pearls are so cute.


What do you think? Is this your type of card?
Leave me a comment below.
Until next time, thank you for visiting and Happy crafting, Dawn x

Sunday, 18 November 2012

Just Believe...again

Here I have a card that didn't quite make it to this months workshop but I thought I would show you anyway.
I started with an A6 card blank. I stamped using versamark ink and one of the smaller stamps from the Just Believe stamp set onto my base card, you can just see it around the edges. I added a marina mist embossed mat using the new Fancy Fan embossing folder, I curled the corner a little so you can see the stamping on the base. I cut a top note die in very vanilla and stamped the largest image from the set using crumb cake ink, I added my greeting with marina mist ink, I inked around the edges of the die cut for detail using crumb cake ink, I trimmed the side of the die cut off. A simple ruffle of very vanilla seam binding ribbon and a button from the neutral selection and this card was finished.


A close up of the seam binding and button.


The embossing folder is so deep and gorgeous, don't you think?


What do you think of this design?
Leave a comment below.

Until next time, happy crafting, Dawn x

Saturday, 17 November 2012

Just Believe workshops

Here are this months two cards using the Just Believe stamp set from Stampin' Up!

I started with a crumb cake square card base, I matted a Very Vanilla square and stamped this with my new Travel Journal wheel in crumb cake ink (anyone who knows me, will know I struggle to use the wheels in straight lines so I carefully trimmed the join of the rubber and peeled it off the wheel, I then backed it with the amazing clear mount cling foam from Stampin' Up! and used it as a traditional stamp on an acrylic block, and here as you can see, straight lines for my background)
I then cut two Top Note die cuts, one from crumb cake and one from very vanilla card, I trimmed the edge off the vanilla layer so it will show the crumb cake layer, I love how this looks.
I stamped two images from the Just Believe stamp set on the middle of the vanilla top note die cut in crumb cake ink, I added my greeting, also from this set, in early espresso in the top right hand corner.
I softened the edges of both of my vanilla layers by inking around the edges with crumb cake ink.
To make my bow a little flatter than tying it in a knot, I took a length of ribbon approximately 36cms long, I held the ends together and tied with twine a distance of about 6-7cms from the point, I then pushed the middle loop up towards where I had tied and tied again, making the centre of the bow, a little wriggling to get it how I wanted and then I cut the twine off close to the bow, this I feel is another option for all of us bow challenged people out there, and yes I am one of them!
Unfortunately this gorgeous ribbon is no longer available from Stampin' Up! argh!!!


The script is beautiful, and very easy to repeat without it looking like it is the same few lines repeated, very versatile wheel/stamp.


Like I said I'm bow challenged but this is cute, don't you think?


We stamped the inside on an insert and then I forgot to photograph it, oops! It adds a lovely finishing touch to the card and looks lovely on the envelope too, wouldn't you open an envelope with detail on before all the usual boring post? I know I would :) 


This is card number two, using the same Just Believe stamp set.
We started with a crumb cake A5 card blank, (a sheet of A4 folded simply in half) then using the smaller leaf design I stamped using versamark around the edges and left to dry.
The tag was cut using a Tim Holtz die and very vanilla card but it could be a ready bought luggage label if you don't have a die.
Using a piece of copy paper, I ripped my hill design, lining this where I wanted I used pumpkin pie ink for the base hills, moving the paper up I then inked with so saffron, I had punched a circle and fixed on to form the moon, I inked around the moon also with so saffron ink, when I was happy with the look I inked the largest design from the set with black ink and stamped across the bottom left hand corner, using black ink I stamped my text across the revealed moon image, I inked around the edges of the tag to add depth. 
Using the cute new Finishing Touches edgelit die, I cut a small strip and stuck it behind the main tag for detail and finished my tag with a piece of coordinating ribbon.
I added a simple pearl insert to finish my card.
What do you think? Is this design your cup of tea? Or a little plain? 
Let me know, leave me a comment below.


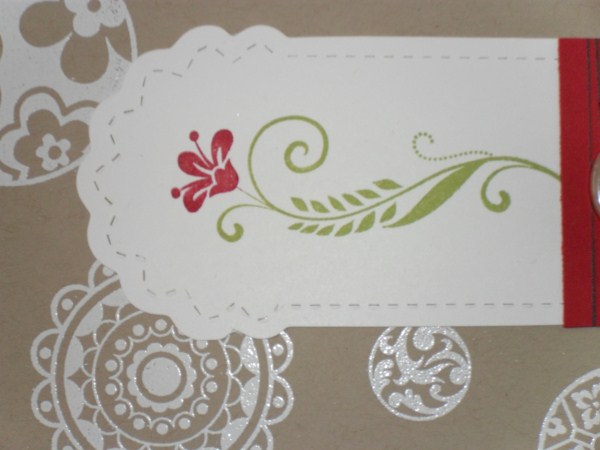
Here is some of the tag detail.


The finishing touches die is super cute and simple too.


Sorry about all the shadows on my photos today, I guess I should be lucky we had sun shine when I was taking them, unlike now when I'm writing this.
I'm holding back from posting this until the afternoon, as I don't want to spoil it for all my lovely ladies who are coming to make these cards with me this afternoon.

Please feel free to post a comment and let me know what you think of these two design.
Until next time, Happy Crafting, Dawn x