Showing posts with label top note die. Show all posts

Saturday, 13 April 2013

FF samples 19

Last two samples from my flowering flourishes workshop then we move on to other things, although you may see the flourish stamp sneaking back in from time to time, so today and tomorrow left.
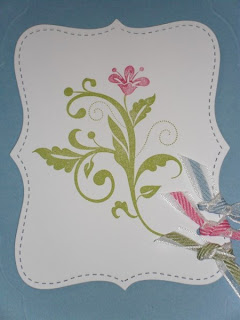
Here is today's card, I love this ribbon, it's super yummy, it's called striped organdy ribbon and is available from the new Stampin' Up! mini catalogue (available in a choice of three colours £8.95 for 9.1 metres)


Pop back tomorrow to see my last flourish sample.
Happy Crafting, Dawn x 

Wednesday, 10 April 2013

FF samples 16

Another flowering flourishes workshop sample.


A white A5 card blank, a paper doilie (cut in half), a top note die cut, a couple of swirl die cuts, a large circle punch-stamped with the flourish, some baker's twine wrapped around the top note die.


A close up of the detail.


Thank you for visiting my blog today.
Until next time, Happy crafting, Dawn x

Tuesday, 9 April 2013

FF samples 15


Butterflies....


An A5 pink pirouette card blank stamped with versamark ink and a flourish stamp.
I die cut a whisper white top note die and stamped using the smallest flourish and pink pirouette ink, I embossed a couple of the layers with embossing folders.
I cut a selection of butterflies using a die and punches.
A fold of ribbon added to the bottom layer of the butterflies.


A close up of the details.


Thank you for visiting my blog today.
Please leave me a comment below to let me know what you think.
Until next time Happy crafting, Dawn x

Friday, 5 April 2013

FF samples 11

Flowering flourishes stamp set.....so versatile.
I started with an A6 white card blank
I die cut my all time favourite top note shape in white and real red, I trimmed the white layer along the perforated lines so the red shows.
I stamped the middle sized flourish on to the die cut, tied some red bakers twine around the lower part of the die cut, added a small stamped greeting and finished.


A close up to see the details.


Thank you for visiting my blog today.
Until next time, Happy Crafting, Dawn x

Saturday, 12 January 2013

Flowering Flourishes stamp set

I have a few birthdays during January and straight after Christmas I was looking for some inspiration, I was looking for something different, something I haven't done before to start my year with a....bang...ping...I don't know what to call it. Then I was looking through a craft magazine (Craft Stamper) and there it was, although my card is different the inspiration came from there and then I put my twist to it.

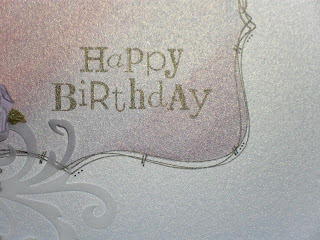
My all time favourite die from Stampin' Up! is the top note die, I just love the shape, size and versatility of it and here it is being used in a way I had never tried before. I cut a template from the centre of a piece of card and kept both parts. I held the negative (often seen as the waste) over my card blank, this time an 8x8 inch square (mmm what a surprise, me using a square blank) and inked through the die cut, I used brushes for this, I graduated my three chosen inks across the die shape moving from bottom left to top right, I dried my ink thoroughly.Then using the positive part, the die cut itself I placed it roughly over the inked part and using a fine black pen drew around the die, lifting carefully and then replacing slightly differently, I did this three times in total and then added some hand doodles. With the die cut still covering the centre panel I inked up one of the flourishes from Flowering Flourishes stamp set and stamped off the top right hand corner and lower left corner. I added a stamped greeting to the lower left. I die cut two swirls from tissue paper and added these poking out from a cluster of paper flowers, one in the top corner and the cluster of flowers in the bottom left. A few pearls added to the stamp flourishes and tada, complete. 


Look at the gorgeous flourish and die cut flourish, you can also see the pearls here too.


The greeting and my attempt at doodling.


What do you think? Is this your cup of tea? Did you see the card I was inspired by in Craft Stamper?
Thank you for visiting my blog, until next time Happy Crafting, Dawn x 

Sunday, 25 November 2012

Just Believe-Rich razzleberry

As I mentioned before, I will try and photograph some of the items I use.
Here is my Just Believe stamp set.


On my last workshop we made this card in crumb cake, everyone loved the design, I had some fabulous comments, thank you ladies, then we got chatting about how different cards can look in different colour combos, so I said I would make another card in a different colour option and this is what I came up with.
Rich Razzleberry and Very Vanilla. 
If you look back a couple of posts you will find the details of what I did, I'm sure you don't want me to write it all out again here.


A close up of the main image.


The gorgeous soft and wide stripey ribbon that Stampin' Up! have discontinued, please, please, please bring them back, they are perfect.


The detail of my script wheel, that I made in to a flat stamp, full details of how to do this are coming soon.


Don't cards look "finished" when they have a stamped insert?
And more professional, in my opinion.


Yntil next time, happy crafting, Dawn x

PS If like me you struggle with computers, let me say that if you use all your allowance for your photographs with blogger, you can resize them and then add them and it doesn't count as your allowance, how does that work..? It took me about 4 hours to discover this...argh!

Sunday, 18 November 2012

Just Believe...again

Here I have a card that didn't quite make it to this months workshop but I thought I would show you anyway.
I started with an A6 card blank. I stamped using versamark ink and one of the smaller stamps from the Just Believe stamp set onto my base card, you can just see it around the edges. I added a marina mist embossed mat using the new Fancy Fan embossing folder, I curled the corner a little so you can see the stamping on the base. I cut a top note die in very vanilla and stamped the largest image from the set using crumb cake ink, I added my greeting with marina mist ink, I inked around the edges of the die cut for detail using crumb cake ink, I trimmed the side of the die cut off. A simple ruffle of very vanilla seam binding ribbon and a button from the neutral selection and this card was finished.


A close up of the seam binding and button.


The embossing folder is so deep and gorgeous, don't you think?


What do you think of this design?
Leave a comment below.

Until next time, happy crafting, Dawn x

Saturday, 17 November 2012

Just Believe workshops

Here are this months two cards using the Just Believe stamp set from Stampin' Up!

I started with a crumb cake square card base, I matted a Very Vanilla square and stamped this with my new Travel Journal wheel in crumb cake ink (anyone who knows me, will know I struggle to use the wheels in straight lines so I carefully trimmed the join of the rubber and peeled it off the wheel, I then backed it with the amazing clear mount cling foam from Stampin' Up! and used it as a traditional stamp on an acrylic block, and here as you can see, straight lines for my background)
I then cut two Top Note die cuts, one from crumb cake and one from very vanilla card, I trimmed the edge off the vanilla layer so it will show the crumb cake layer, I love how this looks.
I stamped two images from the Just Believe stamp set on the middle of the vanilla top note die cut in crumb cake ink, I added my greeting, also from this set, in early espresso in the top right hand corner.
I softened the edges of both of my vanilla layers by inking around the edges with crumb cake ink.
To make my bow a little flatter than tying it in a knot, I took a length of ribbon approximately 36cms long, I held the ends together and tied with twine a distance of about 6-7cms from the point, I then pushed the middle loop up towards where I had tied and tied again, making the centre of the bow, a little wriggling to get it how I wanted and then I cut the twine off close to the bow, this I feel is another option for all of us bow challenged people out there, and yes I am one of them!
Unfortunately this gorgeous ribbon is no longer available from Stampin' Up! argh!!!


The script is beautiful, and very easy to repeat without it looking like it is the same few lines repeated, very versatile wheel/stamp.


Like I said I'm bow challenged but this is cute, don't you think?


We stamped the inside on an insert and then I forgot to photograph it, oops! It adds a lovely finishing touch to the card and looks lovely on the envelope too, wouldn't you open an envelope with detail on before all the usual boring post? I know I would :) 


This is card number two, using the same Just Believe stamp set.
We started with a crumb cake A5 card blank, (a sheet of A4 folded simply in half) then using the smaller leaf design I stamped using versamark around the edges and left to dry.
The tag was cut using a Tim Holtz die and very vanilla card but it could be a ready bought luggage label if you don't have a die.
Using a piece of copy paper, I ripped my hill design, lining this where I wanted I used pumpkin pie ink for the base hills, moving the paper up I then inked with so saffron, I had punched a circle and fixed on to form the moon, I inked around the moon also with so saffron ink, when I was happy with the look I inked the largest design from the set with black ink and stamped across the bottom left hand corner, using black ink I stamped my text across the revealed moon image, I inked around the edges of the tag to add depth. 
Using the cute new Finishing Touches edgelit die, I cut a small strip and stuck it behind the main tag for detail and finished my tag with a piece of coordinating ribbon.
I added a simple pearl insert to finish my card.
What do you think? Is this design your cup of tea? Or a little plain? 
Let me know, leave me a comment below.


Here is some of the tag detail.


The finishing touches die is super cute and simple too.


Sorry about all the shadows on my photos today, I guess I should be lucky we had sun shine when I was taking them, unlike now when I'm writing this.
I'm holding back from posting this until the afternoon, as I don't want to spoil it for all my lovely ladies who are coming to make these cards with me this afternoon.

Please feel free to post a comment and let me know what you think of these two design.
Until next time, Happy Crafting, Dawn x

Saturday, 18 February 2012

Happy Birthday...

Today is a good friend of mine's birthday, the lovely Ali and this is the card I made for her.


I used an 8x8 inch pearl base card. I kept this card simple die cutting a top note in soft suede card and another from the new gorgeous spice cake papers, I also die cut a large paisley shape to use for my bird and a small paisley shape for the wing, using the reverse of the spice cake paper to show contrast, this time adding two wings rather than the one of my previous designs. I coloured my very vanilla seam binding with soft suede ink and spritzed it with gold mica spray to add a subtle shimmer, I added a single strip across the card and added a very simple bow to the right hand side. 
I made my "flower" using a 2x12" strip of paper, I folded it down the centre and stuck the long edge together, I then snipped along the strip approx 3/4 of the way up the strip making a fringe but not cutting through the spine, I took my time and cut my snips close together as I prefer the finish like this. I then glued along the uncut long side and rolled it up tightly making sure the end was stuck well, I use my favorite tombo glue for this, after a few seconds I then gently smoothed the spines into the position I wanted for the finished flower, super cute, I love these flowers, slightly different from what is about at the moment and very easy to make. I have made these out of felt and they would look great on clothes or as bag charms etc

Here is a close up (although not a good pic I'm afraid) of the flower, I added a couple of pearl pins for added interest.
What do you think?
Thank you for visiting, until next time Happy crafting Dawn x

Tuesday, 14 February 2012

Saturday workshop...


Here are the lovely makes from my Saturday workshop, well done ladies they look fabulous!


As you can see we made a birdie card...


We also made two tags, using the lovely two tags die...


We all had the same supplies but everyone came up with something totally unique...


Each person had half a pack of the brand new Spice cake papers...


...half a pack of the brand new spice cake designer buttons...


...a selection of die cut tags in pool party and very vanilla, a card blank and envelope, a top note die cut in soft suede, gems, ribbon and the use of a variety of punches, inks and stamps...all for £10 (what a bargain!)
and these are the fab designs they all made.
Thank you ladies for a lovely crafting time, sorry I couldn't put your name next to your design, I can't remember who made which one and I don't want to get it wrong by guessing.

Thank you for visiting, until next time Happy crafting Dawn x

Saturday, 11 February 2012

Sneak peak...


Today is my first craft class of 2012 and here is a sneak peak of one of the cards we will be making using the gorgeous spice cake papers...!
I Love these papers, I don't usually get soooo excited about papers but these are just amazing, and would suit so many styles of project, I will show you my other projects soon.


Here I have made a very simple card with only one small stamped sentiment, from the swirls and curls verses stamp set so, if stamping is not your thing, this may suit you. The background shape was cut using a Stampin' Up! exclusive die called "Top Note" this is probably my all time favorite die as it is so versatile and you will often see it on my projects.

First I cut a top note in soft suede and another from a chosen piece of spice cake paper (this was a tricky decision as they are all scrumptious) I trimmed the edge off the paper die cut to show the border of the card underneath. As you can see I trimmed the edge of the die cut after fixing to my base card.

I cut the "bird" using a paisley die cut and the wing was a small paisley die cut, I inked the edges with soft suede ink to add definition.

I stamped the cute happy birthday, from the swirls and curls verses stamp set also using soft suede ink and added pearls to the balloon design.

I hope you like my simple card design, pop back soon to see what else I made using these fab new papers, available through your Stampin' Up! demonstrator, if you don't have your own demonstrator please feel free to contact me and I can assist you with your order.

Happy crafting Dawn x