Another busy and strange day, I'm having a few of them recently.
It started by setting up for my afternoon workshop.
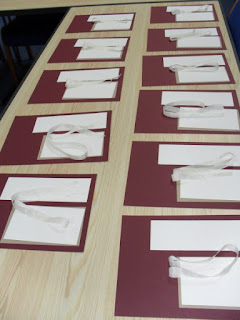
Here are the piles of bits lined up on the table.
Here are the tables all set up.
Everyone gets the same...
This is the first card we made.
I used an A5 card blank in bravo burgundy, a strip of whisper white for the left hand side, stamped with the border stamp from summer silhouettes stamp set, inked in rich razzleberry ink, lined up by eye to make a continuous pattern (I will show you my trick for that when I take the photo of the stamp set, hopefully in the next couple of days)
A crumb cake layer and a whisper white mat for the stamping, this is the best card for stamping on in my opinion! I started by stamping the two size stalks in a random fashion with old olive ink, I then added the burst of flowers in rich razzleberry ink and the smaller flower in marina mist ink, trying to line them up with the stalks, this set is quite easy to do this with, you don't need a stamp positioner. I stamped one of the tiny filler stamps, from the same set, in crumb cake around the whole layer to fill the white space. Some crumb cake ribbon to add a bow, I died this ribbon as it was vanilla to start with, I used a crumb cake ink refil. A couple of drops of ink on your non stick mat, add a few spritz of water and run your ribbon through it well for an even coverage, dry with a heat gun and to get it flat and neat I used my hair straighteners to iron it, well I don't like ironing!
I stamped my greeting from tiny sentiments stamp set onto marina mist card and punched with the versatile modern label punch, I tucked this behind my top layer slightly.
Our second card was also using summer silhouettes stamp set.
I started with a riding hood red A5 card base.
I cut a piece of crumb cake card for the mat, I stamped the leafy branch twice in old olive on to this layer. I stamped three flowers on to whisper white card using riding hood red ink and cut them out by hand, leaving a narrow white edge, I glued the flowers on after shaping them a little and finished them with a rhinestone in the centre.
I stamped using basic grey ink on to whisper white card and a stamp from my stash for the newsprint look near the bottom.
I stamped my greeting from tiny sentiments set with riding hood red ink again on to whisper white card and punched it out using my modern label punch.
For the border I cut baja breeze card with my adorning accent edgelit die, I used both the positive and negative parts, one above my panel and one below.
What do you think?
Is this your cup of tea?
Would you like to join us at our next workshop, making cards like these?
Leave me a comment below or contact me for more details of my next workshop dates.
Until next time, thank you for visiting and happy crafting, Dawn x


